System Requirements:
Windows
- Microsoft Windows 8/7/Vista/2003 (32 or 64-bit)
- 2 GB RAM minimum, 4 GB RAM recommended
- 400 MB hard disk space + at least 1 G for Android SDK, emulator system images, and caches
- 1280 x 800 minimum screen resolution
- Java Development Kit (JDK) 7
- Optional for accelerated emulator: Intel processor with support for Intel VT-x, Intel EM64T (Intel 64), and Execute Disable (XD) Bit functionality
Mac OS X
- Mac OS X 10.8.5 or higher, up to 10.9 (Mavericks)
- 2 GB RAM minimum, 4 GB RAM recommended
- 400 MB hard disk space
- At least 1 GB for Android SDK, emulator system images, and caches
- 1280 x 800 minimum screen resolution
- Java Runtime Environment (JRE) 6
- Java Development Kit (JDK) 7
- Optional for accelerated emulator: Intel processor with support for Intel VT-x, Intel EM64T (Intel 64), and Execute Disable (XD) Bit functionality
On Mac OS, run Android Studio with Java Runtime Environment (JRE) 6 for optimized font rendering. You can then configure your project to use Java Development Kit (JDK) 6 or JDK 7.
Linux
- GNOME or KDE desktop
- GNU C Library (glibc) 2.11 or later
- 2 GB RAM minimum, 4 GB RAM recommended
- 400 MB hard disk space
- At least 1 GB for Android SDK, emulator system images, and caches
- 1280 x 800 minimum screen resolution
- Oracle Java Development Kit (JDK) 7
First intstall JDK 7 or above version in any operating system as mentioned above . And if it is asking path setup the path .
Downloading Android Studio
You can download Android Studio from this link : http://developer.android.com/sdk/index.html#Requirements

Android Studio will be download with .exe extension so just you need to double click on the file and continue with on Screen instructions.
To complete Installation it will take several minutes.
Once Setup has been completed you can start Android studio from programs.
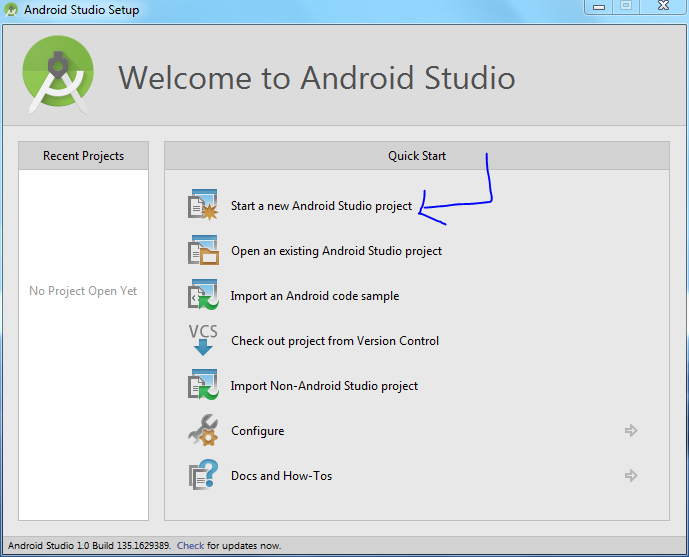
After starting Android Studio it will be looks like below. And from below window select the option
Start a new Android Studio project as shown below
In next window select minimun android sdk version and hit next button as shown below

In next window select Template as Blank Activity and hit next button as shown below.

In next window just hit finish button and your Android Studio IDE will be open for the created project development and in that IDE just left side you can see project button just hit that project explorer will be open as show below

Next you need to download important packages from SDK Manager to run android application and to create Android Virtual Device .
Follow the below steps to download necessary packages from SDK Manager.
From Android Studio select Android SDK Manager short cut it will open SDK manager as follows.

Follow the below steps to download necessary packages from SDK Manager.
From Android Studio select Android SDK Manager short cut it will open SDK manager as follows.
Next select the packages and install them as follows.

After installing packages you can create Android Virtual Device .
Procedure to create AVD you can read in my next post .here is the link http://ramsandroid4all.blogspot.in/2014/12/creating-avd-emulator-in-android-studio.html
Procedure to create AVD you can read in my next post .here is the link http://ramsandroid4all.blogspot.in/2014/12/creating-avd-emulator-in-android-studio.html
No comments:
Post a Comment